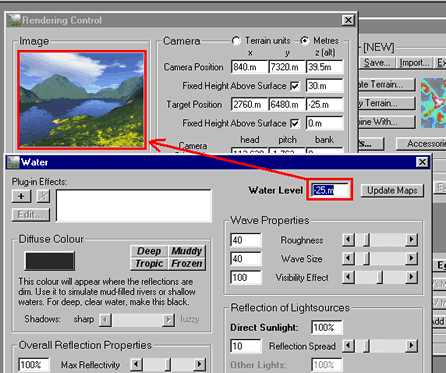
For the rest of the Water Tutorial I have chosen a Water Level of -25m.

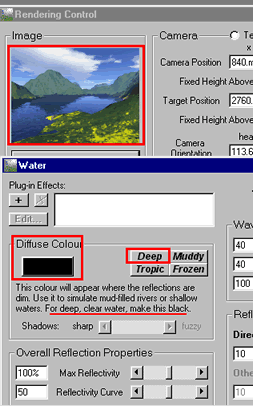
On the left side of the Water Window is the "Diffuse Colour" controls. Click the 'Deep' button. You will see that the box of color gets blacker. I have included a rendered image with the Diffuse Colour set to 'Deep.' You may not be able to see much difference from the render above but there are subtle differences that can be seen in the final, larger rendering.
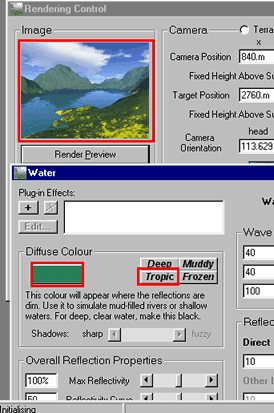
Under the 'Diffuse Colour' controls, press the 'Tropic' button. The color box turns green. Render your image again. You will see the subtle differences that the green (tropic) color brings to your water. After you have tried out "Tropic," click on "Muddy" and render your image. Then click on "Frozen" and render your image.
But wait! You can choose whatever color you want for your water. Click on the color box itself. This will bring up the Diffuse Water Colour Dialogue Box. Notice that there are three colors: Red, Green, and Blue. Each color has a slider to the right of it. Play around with the sliders to see what colors you can generate. (Remember to click and drag...)
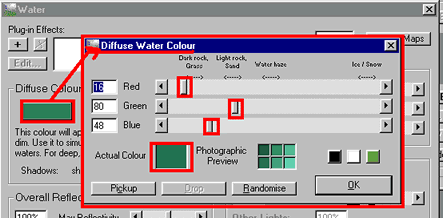
I have decided to make bright purple water. Notice where the RGB (Red, Green, and Blue) sliders are now. Find a color you like, then click the "OK" button.
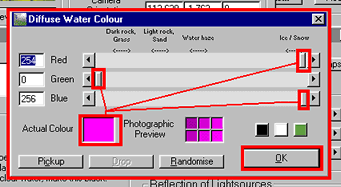
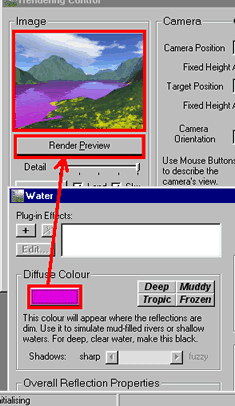
The Diffuse Water Colour Dialogue Box will close and your new color will appear in the Water Window (in the Diffuse Color Controls). Render your image at maximum detail.
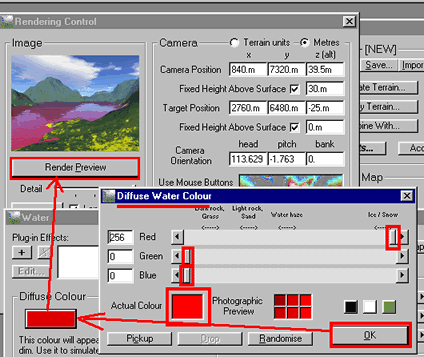
Here I've pulled up the Diffuse Water Colour Dialogue Box again and changed the color to red. My lake looks polluted or it looks like a good start for a lava flow...(note where the RGB sliders are).
You may want to change the color back to "Deep" to try out the rest of the Water controls.
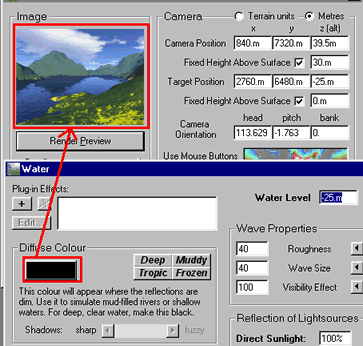
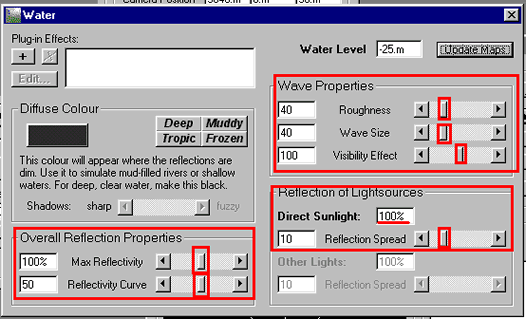
Since this is a Quick Tour I am not going to explain the rest of the Water Controls right now...but I encourage you to try them out: These are the Terragen Water Control Defaults for Wave Properties, Overall Reflection Properties, and Reflection of Lightsources. Try changing one control at a time to see what happens to the water in your image. Have fun!
Back to:
Part Two: Rendering Preview Image