Now you're ready to create your own Terragen Worlds!
When you open Terragen this is what you'll see:
1. Under Plan View of Landscape in the Landscape Window, there are two radio buttons:
By default, Terragen 'chooses' Greys:
Click on the little white circle to the left of Cols:
2. In the Landscape Window, under Terrain - [NEW] click the Generate Terrain button:
3. The Generate Terrain button brings up the Terrain Genesis Dialogue Box:

4. Click on the Generate Terrain button in the Terrain Genesis Dialogue Box:
Then click the Close button in the Terrain Genesis Dialogue Box:
This is what you'll see now:
This is the Plan View of Landscape or the overview of your world. It is as if you were flying in a plane and looking straight down. The white areas are the highest peaks of the ground and the dark or blue areas are the lowest valleys. The 'hotter' colors are 'higher' in altitude. The 'cooler' colors are lower in altitude.
Congratulations! You've created the first part of your new world! Even though it doesn't look very exciting, the Landscape map is your foundation for adding colorful rocks, grass, flowers, sky, water, clouds and everything else to make your world cool and unique.
This is what your world might look like from ground level.
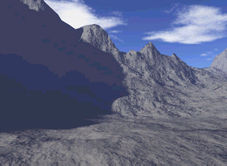
To learn how to do this, click Part Two: Rendering Preview Image.
Back to:
Part Two: Rendering Preview Image
Part Three: Quick Intro to Surface Maps